Pages

Tuesday, December 27, 2016

Cinnamon Rolls with Maple Glaze


I'm having an issue. I have a recipe and pictures, but I don't have too many words today.


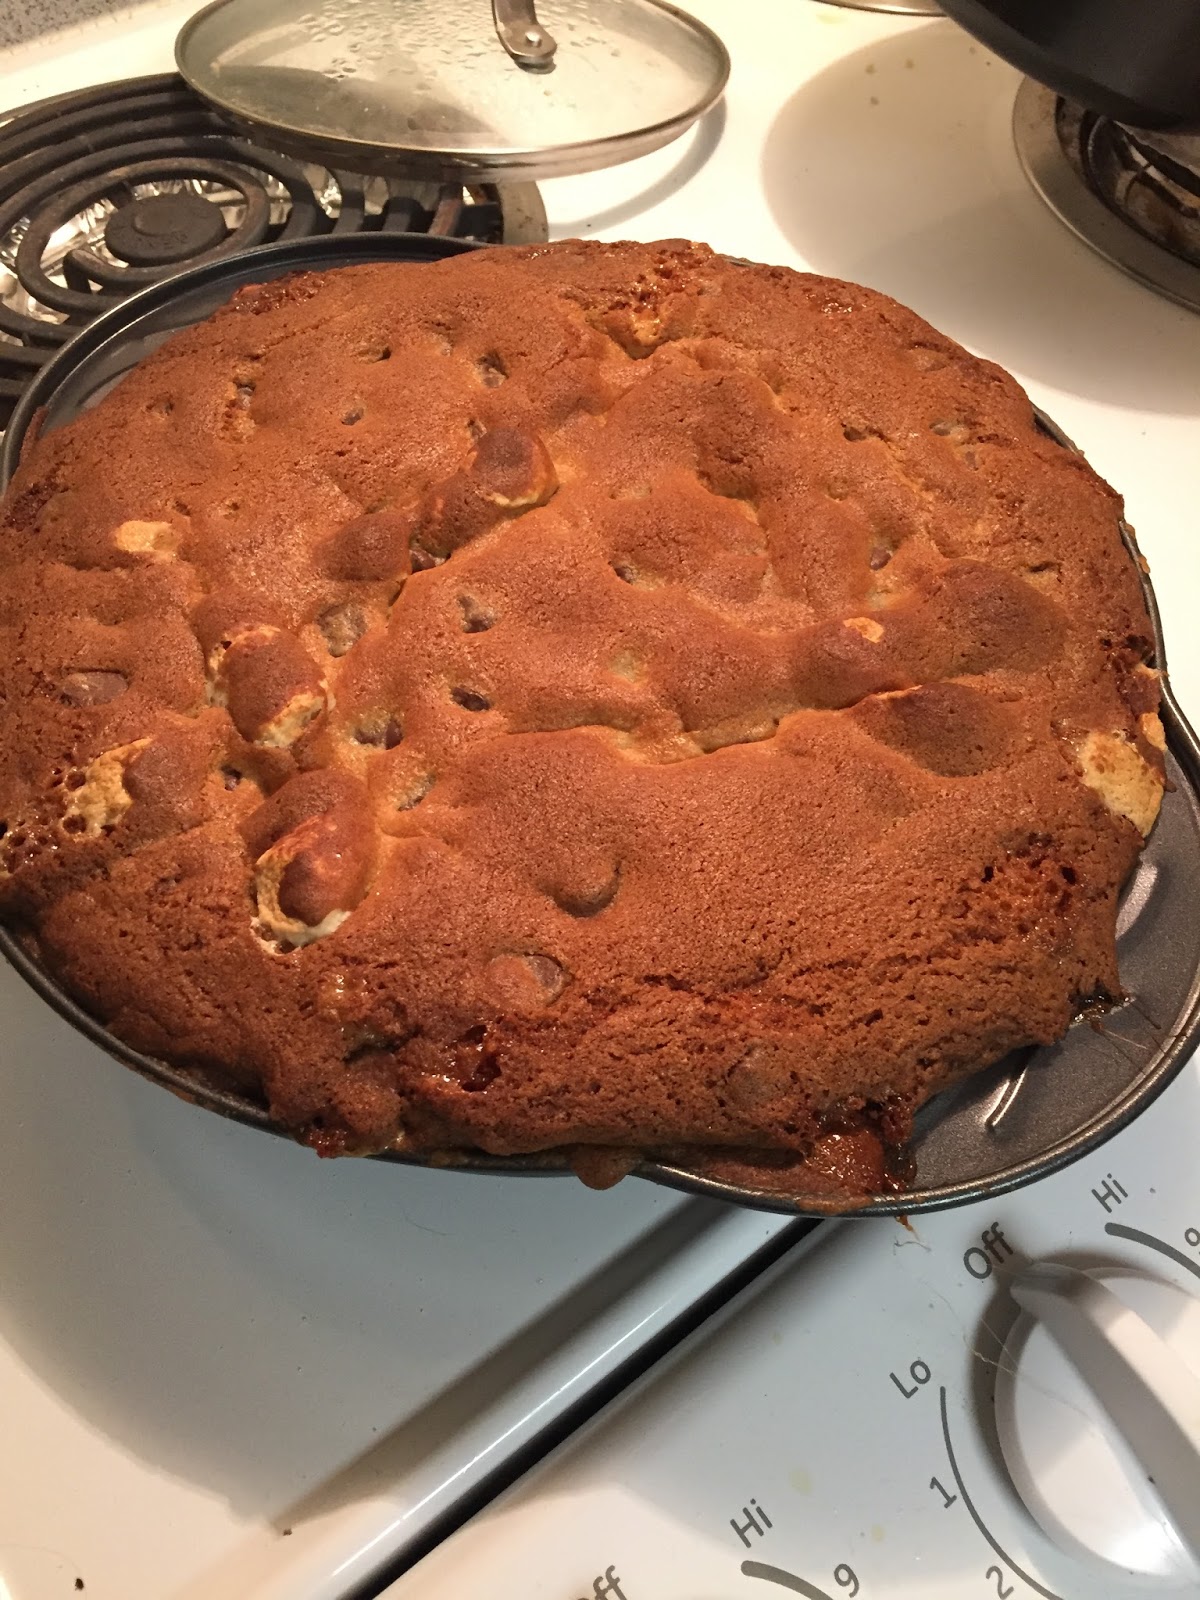
These were a part of my annual holiday baking binge (which isn't much different from my every day life, but still....). I've realized I love working with dough, so I made cinnamon rolls a couple different ways, but these were my favorite.

I hope you all had a lovely holiday and wish you a happy new year.

Yum.
Cinnamon Rolls with Maple Glaze
Ingredients

dough (adapted from How Sweet Eats)
2 cups whole milk
1/2 cup vegetable oil
1/2 cup sugar
1 package dry yeast (or 2 1/4 teaspoons)
4 1/2 cups all purpose flour
1/2 teaspoon baking powder
1/2 teaspoon baking soda
1 tsp cinnamon

filling
1 stick butter, melted
1 tsp cinnamon
1/4 cup brown sugar
1/4 cup sugar

glaze
1 cup confectioner's sugar
1 tbsp maple syrup
1/4 cup buttermilk
1 tsp vanilla extract

  1. Heat milk in microwave for about 1 minute, until lukewarm. Add vegetable oil and sugar, stir. Sprinkle in yeast and let sit about 15 minutes, or until foamy.
  2. Move mixture to an electric mixture and add flour, baking soda, powder, and cinnamon. Stir until combined, then run mixer for about 6 minutes, kneading until dough is elastic and smooth.
  3. Allow dough to rise for 90 minutes or until doubled.
  4. Punch the dough down, then empty onto a floured counter. Roll out into a rectangle, making sure dough is roughly 1/2 an inch thick.
  5. To make filling, combine melted butter, sugars, and cinnamon. Spread evenly on the dough, then roll into spiral tube.
  6. Slice into 1-inch sections, then place rolls into a buttered pan. Let rise for 30 minutes.
  7. Bake at 350 for 25 minutes, or until golden brown.
  8. To make glaze, blend ingredients together. Pour over warm rolls and enjoy.

Monday, November 28, 2016

Chai Pie

If you follow me on Snapchat, you're aware that I baked kind of an obscene amount over the course of Thanksgiving. The final count ended up being 4 pies (pumpkin, apple-cranberry, chai spice, and Kentucky derby) and one chocolate cheesecake. Also apparently no one communicated this to the rest of the family, so we ended up with 8 pies and a cheesecake for 17 people. Oh well. Also, wait until you see how much I bake at Christmas. It makes Thanksgiving look like amateur hour.

Anyway, this recipe is for the chai spice pie. There's only one picture because I sort of forgot to take them and also wasn't expecting this to turn out that well. But here we are.

I sort of love baking pies lately. I love baking everything lately, and it's a favorite hobby of mine. It keeps my hands busy, it's repetitive to a certain degree, and I've been doing it forever, so it brings an amount of familiarity which is calming to me.

In other news, has anyone else seen Moana? I went with my fiance, siblings, their significant others, mom and grandma. Let me just tell you, going on a "triple date" with your younger siblings and their boyfriend/girlfriend is a FUN time, especially when you're engaged and they've been dating for like a month. My mom told me to act as a chaperone, and I thoroughly enjoyed that task.

The movie is pretty good though too. I loved the music and the setting, and Moana herself is likable. I also just thought she was beautiful and love that she has a realistic body type, especially compared to some of the classic princesses.

In other news, the Beauty and the Beast trailer played and I cried. Emma Watson is playing another of my childhood role models and that makes me really emotional.

Okay, that's enough rambling for today.

Chai Spice Pie
Ingredients
2 sleeves cinnamon graham crackers
1 stick salted butter, melted
3 eggs
3/4 cup sugar
1 tsp cinnamon
3/4 tsp cardamom
1/4 tsp allspice
1/4 tsp cloves
2 1/2 cups heavy cream

  1. Crush the graham crackers into coarse crumbs, then drizzle in the melted butter. Stir to combine, then press into a greased pie pan. Refrigerate as you make the filling.
  2. Whisk together the eggs, sugar, and spices in a medium bowl.
  3. Microwave the milk until hot, then slowly stream into the egg mixture, whisking constantly.
  4. Gently pour into crust. Some of the crust may combine with the filling, this is totally okay.
  5. Bake at 400 for 30 minutes. Filling should be set. Chill for at least 2 hours before serving. Enjoy!

Monday, November 14, 2016

Asparagus, or Why I Shipped Cookies to People I've Never Met


Hi. If you're American, I think we can all agree that the last week has been a little rough. Regardless of who you wanted to win the election or who you voted for, I think the ensuing fear and hate has been pretty grating and exhausting for us all. I'm about ready to leave Facebook forever.


The election stress and upset has been especially difficult for me and many people I know because I/we are volunteers for Crisis Text Line. Crisis Text Line is a free, national service people are able to text when in crisis and be connected with a trained counselor. On election night and for several days after, we experienced quadruple the usual traffic. Volunteering with Crisis Text Line has made me a better person, and I love it so much, but it's exhausting at times. Whether you think the fear many people experienced as a result of the election was warranted or not, those people and their emotions are very real. I talked to dozens of texters who were terrified of the future and hurting.

Which brings me to cookies. The Crisis Text Line community is so good, y'all. A lot of us were having a rough week. Being there for so many people who are hurting takes it out of you after awhile. But a truly beautiful thing happened. Our Facebook group page was suddenly inundated with posts by my fellow counselors offering all sorts of comfort to each other--everything from meditation videos to personalized playlists. This warmed my heart so much. To pay it forward, I made my own post offering cookies and brownies to anyone who sent me their address. Baking makes me so happy, and I'm constantly looking for people to give love in the form of sugar and chocolate. Today I went to the post office and shipped cookies to eight people I've never actually met. These people are so amazing. They dedicate their time to helping others and spreading positivity, both to texters and to each other. In my book, that deserves to be celebrated. Share cookies with the ones you love, y'all. It'll warm your soul.

If you're in crisis, text Hi to 741741. Crisis Text Line is available 24/7.

Bacon Asparagus
Ingredients
1 lb asparagus, with the woody parts cut off
8 strips of bacon, diced
2 cloves garlic, minced
1/4 cup panko bread crumbs
dash of red pepper flakes
2 tbsp salted butter

  1. Fry the bacon until crisp over medium heat in a pan (I like cast iron skillets).
  2. Add the garlic to the pan, stirring constantly. Garlic cooks fast so be careful.
  3. After about a minute, add the asparagus and toss with the bacon. Cook, stirring occasionally for about 5 minutes, or until brighter green and tender.
  4. Add the breadcrumbs, red pepper, and butter. Stir constantly until butter is melted and breadcrumbs are lightly toasted. Enjoy!

Thursday, October 13, 2016

On Language Learning (and Cookies)

Forever my love
For those of you that don't know, in addition to my psychology degree (and 85% of a biochemistry degree...lol), I'm working on a Spanish minor. Learning a language, especially in school, especially as an introvert who doesn't like talking in big groups, especially classes, is weird. There are moments every day where I feel pretty fluent. Moments when my Hispanic residents are on the phone with their parents and I actually comprehend the conversation. Moments when I'm writing an essay and thinking in Spanish and it just flows.

But. There are also moments where I just feel (for lack of a better term) like such a freaking white girl. Which I am (mostly Swedish and German. that's about as white as it gets.). Moments where mi profesor asks me a question and all I can do is blush and mumble "qué?" Moments when I'm lost in class, or one of my group mates (who are all Hispanic and actually bilingual) speaks so fast that it just sounds like a blur to me. Or sometimes I fumble the present tense. It's great. My pronunciation gets weird sometimes, and as someone who has spent my entire life in the south, the fast, staccato rhythm is hard for me.


Language learning is weird, and it gets weirder when you transition into classes that trust that you're competent in the language, and focus on just teaching you literatura y cultura. Your ideas and thoughts actually matter more than the proficiency with which you communicate them. This is intimidating. Learning how to BS an essay about literature in a second language is weird and funny and makes me feel a lot more fluent than I probably am.


So why learn Spanish? It started because I was dead set on med school at U of Miami, and in Miami, you'd better be able to habla. At some point, I actually did fall in love with the language, and more than anything, I'm honestly in love with the idea of being bilingual. The idea of being able to communicate effectively and relate with more than one group of people is so appealing to me, which is why I love culture classes so much. Maybe that's and idealized version of things, but I like it, so I'm sticking with it.

También: I thought about writing this post in Spanish, but I have a little bit (okay a lot) of fear of judgment when it comes to my proficiency. So instead you get a post in English with awkward uses of Spanish vocab. Sorry.

S'more Stuffed Giant Cookie
Ingredients
2 sticks of butter
1 cup brown sugar
1/2 cup sugar
2 eggs
1 tbsp vanilla
1 tsp baking soda
1/4 tsp salt
2 3/4 cup flour
1 cup chocolate chips
3 milk chocolate bars
3 graham crackers
1/4 cup mini marshmallows

  1. Stir together the butter and sugars.
  2. Add in the eggs, vanilla, soda, and salt. Mix until smooth.
  3. Stir in flour.
  4. Gently fold in the chips.
  5. Press about half the dough into a 9-inch round pan.
  6. Add a layer of graham crackers, then another layer of chocolate bars. Top with the marshmallows.
  7. Carefully spread the rest of the dough on top.
  8. Bake at 350 for 35 minutes. Top will be dark golden, middle will be gooey. Enjoy!

Friday, October 7, 2016

Things I'm Loving Lately

College got me like
Things I'm Loving Right Now

  1. Earl Grey and English Breakfast tea
  2. Community
  3. Andie Mitchell's cook book, Eating in the Middle. The recipes are as amazing as the philosophy behind them.
  4. Twistee Treat. If you follow me on Instagram you know that I drove there Sunday night to try it.
  5. La Tienda. It has my heart forever.
  6. Bagels. Yes, I work in a bagel shop, but they're suddenly extra appealing.
  7. Rent
  8. Baking. I can't stop.
  9. Roasted veggies
  10. Julia Child
  11. This pasta. I made it last week and then ate it forever (seriously, I made way too much).
  12. Urban Decay liquid liner (in RED!)

Monday, October 3, 2016

A Birthday Cake for Mom

Hi Mom.


I know you'd probably prefer I celebrate your birthday with fewer carbs and a little less sugar. I could've made a nice salad with steak and quinoa, topped with some strawberries (good idea, we'll revisit that one). If you were going to eat a cake, you would've preferred carrot. But I thought something new could be fun.

Dusted with cocoa powder
So instead, we have a perfectly moist chocolate cake topped with peanut butter frosting, not too sweet, but salty, with crunchy little granules of sugar. And I drove it down to Tarpon to surprise you and eat dinner by the sponge docks. Happy birthday, Mom.

This makes me weirdly aware of how rarely I take horizontal pictures
Fun fact: I'm a terrible example as a baker, which means I don't actually measure ANYTHING. Unless I'm making something really finicky, I kind of just eyeball everything. Oops. It's worked out so far.

Chocolate Cake and Peanut Butter Frosting
cake
I used this recipe

frosting
1 stick salted butter
2/3 cup peanut butter
1/2 cup granulated sugar
1/4 cup powdered sugar
1/2 tsp salt

  1. Microwave the butter and peanut butter for 45 seconds. The butter will be pretty much all melted, and the peanut butter will be stir-able.
  2. Stir in both sugars and the salt until smooth.
  3. Spread on cooled cake or eat with a spoon. Enjoy.

Monday, September 26, 2016

The Blog is Back!


I made pie. And it looks a mess, but that's okay because I'm mostly just excited to tell you that I'm back and I love food and cooking and sharing food with the people I love.


So, this summer I ended up disappearing because I was studying for a cute and fun little test called the MCAT. Ha. No. I did study for and take the MCAT (no score yet), but it wasn't cute or fun. I think the test went well, but getting to test day was mostly filled with frustration, crying, and too much coffee. (oh yeah, if you follow me on Insta you know that I like coffee now. not sure what that's about, but.....).


Anyway, here's some thoughts on the MCAT, medicine, and life in general. 

If you saw the hot freaking mess I was during Spring semester, you're probably wondering how and why I ended up studying for the MCAT anyway. Well, here's the thing. I never really stopped wanting to be a doctor. I had an exceedingly rough Fall of my junior year, and emerged with a new major and a whole lot of sadness in my heart. Basically I felt like I'd failed at being a biochemistry major and a premed and was, honestly, worn out and tired of spending every second of my life in the library with anxiety and exhaustion clouding my brain. Science, particularly medicine, had come to symbolize everything I wanted and couldn't achieve. 
In a lot of ways, I stopped thinking I could do it. But it never left my mind. Thinking about doing something other than being a doctor, while exhilarating at first, terrified me in more than a "fear-of-the-unknown" kind of way. It hurt a lot.
Finally, after a semester of watching my wallow, my mom gave me a piece of mom-wisdom in a Mexican restaurant, and I cried and decided to try again. The mom-wisdom? "You're selling yourself short if you just walk away from this and don't even try. There's no reason why you can't be a doctor as a psych major." Thanks Mom.
And then, something amazing happened: I realized that I actually like science. I actually love the human body. I love knowing how metabolism works. And, weirdly, I kind of love studying (when I'm not caffeine crazed and hyper-emotional). I was studying because I wanted to, and taking the MCAT because I wanted to. And it felt so good. I remembered why I wanted to be a doctor in the first place.

On test day, I walked into the testing center feeling more peaceful than I would've thought possible. The test was my victory lap at the end of 4 long months of hard studying. It was the cherry on top.

And so, pie. I made it awhile ago, I know peaches aren't really in season anymore. But please appreciate it anyway. I'll have something a little more seasonally appropriate soon.


Blueberry Peach Streusel Pie
Ingredients
crust:
12 graham crackers, pounded into crumbs
1 stick of butter

filling:
4 peaches, cut into chunks (I didn't peel them)
3/4 cup blueberries
1/2 cup brown sugar
1/4 tsp salt
2 tsp corn starch
juice of 1 lemon

streusel:
1/2 cup oats
1/2 stick of butter
2 tbsp brown sugar
1/2 tsp cinnamon
1/4 tsp salt

  1. Melt the butter and stir in the crumbs. Mash into a greased pie pan, making sure you get the sides. Put into the fridge while you make the filling.
  2. For the filling, gently combine the fruit with the other ingredients. Let sit for 5 minutes so the fruits can release a little juice.
  3. Add filling to the pie pan.
  4. To make the streusel, melt the butter and stir in the other ingredients. Scatter on top of the pie.
  5. Bake at 350 for 25 minutes. If the top starts to burn, cover it with foil. We ate this with whipped cream, but vanilla ice cream would be pretty amazing too. Enjoy!

Friday, July 15, 2016

Burrito Bowls

Basically I made homemade Chipotle. Only not exactly, because I like mine better. And it's on quinoa. Which is better than rice.


For anyone who wants a laugh, you should've seen my snapchats while attempting to make rice. I was prepping it ahead so I could make this for dinner because yum.  Buuuut here's the issue: I have control issues. Rice requires that you bring it to a boil, reduce the heat, put a lid on it, and then WALK AWAY. For like an hour. You have to just WALK AWAY, ignoring your precious rice and just trusting that it will grow up and become rice. This is not something that I excel at.


So yeah. These burrito bowls have quinoa instead, because quite frankly I like it better, it doesn't take as long, and it doesn't stress me out as much. So much better. Also I think it might be healthier? Or maybe that's just me. Next time you want to tell me I'm a good cook, please just remember that rice stresses me out to no end. Anyway.


Honestly, you could just forego the quinoa and chicken altogether and eat the guac and pico with chips. But um, that might ruin the nice, healthy, balanced vibe we're going for. And you need the protein. Or, um, I do. So yeah, make the chicken and quinoa. Then just stir it all together. Or I guess if you like stuff better separate, you can leave it like that, but.....I'll think you're a little weird. Sorry.

Quinoa Burrito Bowls
Ingredients
guac
store bought or this recipe

pico
3 tomatoes, roughly chopped
1/4 cup red onion, chopped
1/2 jalapeno, minced
2 ears of corn, cut off the cob
1/3 cup cilantro, roughly chopped
1 clove garlic, minced
juice of one lime
salt to taste

chicken
1.5 lbs chicken cutlets
1 can chipotles in adobo
1 tsp cumin
2 tbsp honey

2 cups quinoa, cooked (I cooked mine in vegetable broth but that isn't mandatory)
1 tbsp butter

  1. Make the guac, unless you're using store bought.
  2. Make the pico by combining all ingredients in a bowl and gently mixing. Cover and put in fridge while you make everything else.
  3. Prepare the chicken by seasoning with the cumin, then pour on the adobo sauce and some of the chipotle peppers, chopped. Drizzle on honey, then turn the cutlets a couple of times to totally coat. Refrigerate for an hour.
  4. Add the chicken to a pan over medium heat. Cook for about 5 minutes per side, then quickly slice.
  5. Mix the hot quinoa with the butter.
  6. Serve in your preferred ratio, and enjoy with tortilla chips or just a fork.

Wednesday, June 29, 2016

Birthday Cake Popcorn


Colors. Sweetness. Salt. Chocolate. Joy. In my opinion, these are all lovely things best served with sprinkles. Is that a weird thing to say? Probably. I'm gonna roll with it. But anyway, all those words can describe this popcorn too. It's a fun one. It's cutesy. 


I made this one night to eat while watching How to Get Away with Murder. If you watch it, please come talk to me because I have a lot of feelings about it. I finished both seasons in about a week and a half. So good. And wow, Viola Davis. I totally understand why she got an Emmy. So much raw emotion. This recipe is sunny and happy to offset the darkness and sadness in the show. It works out.


Birthday Cake Popcorn
Ingredients
6 cups freshly popped popcorn (you can use microwave or pop it yourself)
1 stick salted butter, melted
8 oz. white chocolate
1/3 cup yellow cake mix
1/2 cup M&Ms
sprinkles
  1. Toss the popcorn with the butter and salt to taste. Spread on a baking sheet with parchment paper.
  2. Melt the chocolate carefully, either in a glass bowl over a pot of boiling water, or in a microwave.
  3. Once chocolate is melted and smooth, stir in the cake mix.
  4. Pour cake mix over the popcorn and sprinkle with M&Ms and sprinkles.
  5. Let cool and enjoy.

Wednesday, June 22, 2016

Thai Chickpea Burgers


I grew up in a very carnivorous household. I'm pretty sure that the idea of a bean burger is downright offensive to my parents (hi Mom and Dad. please let me come home still.). As a result, I didn't try a bean burger for the first time until I was in college (desperate times in the dining hall freshman year). To my surprise, it was really good. I personally don't enjoy veggie burgers, but bean burgers are different enough that they don't disappoint my raised-on-grade-A-beef taste buds.


Am I saying that these will make you want to ditch meat forever? No. Definitely not. I wouldn't want to either. That being said, these are a nice way to switch things up and save a little cash. Just don't expect them to be like meat. They aren't. They're very different in both flavor and texture. But different is good. Trust me.

Thai Chickpea Burgers
Ingredients
1 can chickpeas
1 can canellini beans
1 egg
1/2 cup breadcrumbs
1/3 cup shredded carrot
1/3 cup fresh cilantro, chopped
1/4 cup peanuts, roughly chopped
sesame oil for cooking
buns

sauce (adapted from How Sweet Eats)
1/2 cup Thai chili sauce
1/4 cup rice vinegar
1/4 cup coconut milk
2 tbsp peanut butter
1 tbsp soy sauce
1 tbsp sriracha (or more/less, depending on your spice preference)

  1. Start by making the sauce. Combine all of the ingredients in a small pot over medium heat. Stir until smooth. Bring to a simmer and allow to cook for about 1 minute. Let cool, and sauce will thicken.
  2. Mush the beans using a potato masher or fork. If you want smoother burgers you can use a food processor or blender, but I don't mind minor chunks. It adds texture in my opinion.
  3.  Add the egg, breadcrumbs, carrot, cilantro, and about 1/2 a cup of the sauce.
  4. Form the mixture into patties. I made 4 but they were pretty big, so it's up to you. Sliders would be yummy! The mixture is going to be pretty sticky and wet.
  5. Add the burgers to a pan with a little bit of sesame oil over medium high heat. Cook for about 5 minutes on either side.
  6. Serve the burgers topped with the sauce and some chopped peanuts. Enjoy!

Wednesday, June 15, 2016

Bubble Bread


Hi there. Welcome back to Kimmie's Kitchen. Here's more of Carbfest 2k16. I'd apologize, but I'm not sorry. Not at all.

Did you guys watch the Tony's on Sunday? I don't ever watch award shows, but, like any good theatre nerd (even one who hasn't touched a stage since 2013), I was in front of my best friend's TV on Sunday night cheering every time Hamilton won. All eleven(!) times. I also cried during pretty much every speech. I'm not kidding. Especially Renee Elise Goldsberry and Lin-Manuel Miranda. Wow.

My current oven situation
But anyway, on to talking about this bread. It's so good. I'm a little embarrassed to call this a recipe, but here we are. It's basically monkey bread with chocolate, and if you're anything like me you'll agree that chocolate always improves food. This is the perfect thing to bake and then take to a friend's apartment late at night. That's what I did with it anyway. I highly recommend doing the same. 

Also, you can totally bake this in the little ovens we have in Infinity Hall. It's doable, I promise. As evidenced by the above photo. 


Bubble Bread
Ingredients
1 can refrigerated biscuit dough
16 unwrapped Dove chocolate promises (or you could use Hershey's kisses or any other little chocolate chunks)
4 tbsp salted butter, melted
1/2 cup sugar
1 tbsp cinnamon

  1. Cut each biscuit in half. Roll each half into a ball around a piece of chocolate.
  2. Blend together the sugar and cinnamon.
  3. Roll each ball in butter then in the cinnamon sugar to coat thoroughly. Stack in a loaf pan. Repeat until all balls are coated and stacked.
  4. Bake at 350 for 25 minutes. If the top gets too brown, cover with foil and continue baking. Enjoy!

Saturday, June 11, 2016

Plan to Eat


So. Let me tell you about this web service that I LOVE. This is Plan to Eat, and it's amazing. I don't know about you, but I am REALLY bad at grocery shopping. If I go to the store without a list, it's a mess. I would walk out with a gallon of ice cream, a few bags of chips, some soda, a package of chicken, and like three apples. Not only is this REALLY unhealthy, but I was constantly running out of food but also having other food that was going bad. It was awful. Enter Plan to Eat.

This little thing has saved me so much money. It lets me plan my meals a week (or more) in advance, and then makes my shopping list for me. Which is great, because I'm somehow bad at making shopping lists too. I don't know. I'm not a real adult. But it's great, because this way I can only make the food I'll need for the week, and it also helps plan cooking for the blog. Plan to Eat lets you import recipes from anywhere, then enter them into your little calendar. Seeing my full calendar gives me warm fuzzies inside. But um, planning is like that for me. It's not expensive, $5/month or $40/year, and it's definitely saved me at least $40 in food waste. It makes budgeting much easier too. Also, as a busy college student, this has definitely detoured me from eating out most of the week. Love.

These are my honest opinions and I was in no way sponsored by Plan to Eat.

Wednesday, June 8, 2016

Ombre Smoothie Stacks

Look, I have friends! 
I feel like a lot of my recent posts have started with me talking about how excited I am for summer. This one won't be an exception. It's still summer, this recipe is summery, and I'm still excited. So there. Happy summer. Enjoy a colorful smoothie stack.


Fun thing about this: I made it in Infinity Hall at UF, the lack of kitchen can't stop me. All you need is a blender, lovelies. A freezer helps get a pretty stack but it isn't required. We give you ice, which is a pretty key ingredient. You can handle this recipe, even if you live in the land of no kitchens. You know you wanted to buy a blender anyway (or even one of those cool Magic Bullet things).


Speaking of UF....I'm starting my senior year (or maybe it's already started, summer semester is confusing). WHAT? I honestly still have days where I wake up and have to remind myself that this is COLLEGE. It's weird because I don't feel adult or anything and I definitely thought that would've happened by now. But instead I'm just here, living my life. Maybe when it ends, I'll suddenly understand? But guys, I still feel 17 and I still feel just as much awe that I'm actually in COLLEGE. Please tell me I'm not the only one.

Ombre Smoothie Stacks
Ingredients
honeydew layer
2 cups honeydew, cut into chunks
8 oz vanilla yogurt (I used low fat)
1 cup ice

pineapple layer
2 cups pineapple chunks
1/2 cup coconut milk
1 cup ice

watermelon layer
1 cup watermelon chunks
1 cup ice
  1. Blend each layer individually, starting with the honeydew.
  2. Pour into glasses and freeze as you make each additional layer. When you pour the upper layers, be careful, but when they mix a little you'll get to see the ombre, so don't stress too much. Enjoy!

Saturday, June 4, 2016

The Metro Diner


The Metro Diner is a Jacksonville transplant, which has come here to Gainesville. I was really excited about this because I saw an episode of Diners, Drive Ins & Dives where Guy visited it. I know, my TV choices are questionable at best. ANYWAY.


To clarify, I didn't eat all of this food alone. I was with three other people. Be that as it may....you get a lot of food at Metro Diner. That hashbrown was bigger than my hand. Those pancakes were gigantic. And wow. It was all so good.


We didn't get it, but they also have chicken and waffles featuring half a chicken. I know. But yeah, everything we ate was really good and they serve breakfast all day, and that's a blessing, as far as I'm concerned. Go go go.

Wednesday, June 1, 2016

Pizza with Fried Chicken, Bacon, and Mac & Cheese

Say what?


Yup. You heard right. That's a pizza with fried chicken, bacon, and macaroni n cheese. Beer mac n cheese, that is. I know.


Did I go overboard? At least a little, right? I figured. But it's okay. This is worth the unbelievable carb fest. And I mean, according to my MCAT review book, carbs are really important. They fuel your body. And yeah, it's more complicated, but just go with it.

Speaking of which, I registered for the MCAT yesterday and aghhhhhhh. FREAKING OUT. Just a little. You know how it is. So um, September 10th. That's the magical (read: terrifying) day. There may be some correlation between the start of my MCAT studying and my developing a liking for coffee. These things go together, you know.


But it's okay. Because we have this pizza. This pizza isn't too hard to make, and is crazy and comforting enough to help you feel better after a long day of MCAT studying. It's also good to emotionally eat when you're angry about the treatment of mental illness in America. But um, that's another post. Aaaanywaaaaay.


Frat Boy Pizza
Ingredients
1/4 cup (1/2 stick) of butter
1/4 cup flour
1 cup dark beer**
1 1/2 cups whole milk
1 tsp salt
1/4 tsp pepper
1/2 tsp garlic powder
12 oz shredded cheddar cheese
1/2 box macaroni, cooked and cooled
6 slices bacon, cooked and crumbled
1/2 pound chicken tenders, diced (I got the ones from Publix)
1 pizza dough
1/4 cup shredded Parmesan cheese
  1. Make the mac n cheese first: Start out by making a roux. Melt the butter over medium-low heat, then add the flour, stirring. Once thickened and slightly browned, add the beer, milk, and spices. Stir.
  2. Continue stirring over medium heat until the mixture boils. Allow to boil for 3 minutes, then add cheese.
  3. Stir until cheese has completely melted.
  4. Carefully fold in pasta. Let cool.
  5. Shape pizza dough into and awkward oval or a better shape. Bake at 350 for 8 minutes.
  6. Remove dough from oven. Sprinkle with about half of the bacon and chicken. Add about half of the mac n cheese. Top with the remaining bacon and chicken, then add another layer of mac n cheese. This will make a VERY thick pizza. If it's too much for you, you don't have to add all of the macaroni, but it's better if you do.
  7. Top with the parm and put back into the oven for another 18 minutes, until the top in slightly browned. Enjoy!

Saturday, May 28, 2016

Satchel's Pizza


Satchel's is kind of a Gainesville legend, it would seem. I'd been hearing about it since my freshman year, but the first time I actually tried it was just a few weeks ago. The prices are a little steep, but reasonable when you consider what you're paying for. It's easy to see why this place has such a cult-like following.

The atmosphere is great. It's artsy and eclectic, from the sculpture outside to the local art that adorns the walls. Satchel's also makes their own sodas. I tried three of them, and all were really good. My personal favorite was the root beer, and I'm not even a big fan of root beer typically. We also got a four topping pizza (with steak, bacon, garlic, and onion), which was really good too. I hope to go back soon and get to sit in "the van", which is exactly what it sounds like.

If you're in the area, go soon (and invite me)!

Wednesday, May 25, 2016

Salmon Tacos with Sweet and Spicy Sauce


First things first. I love salmon. I love tacos. I love sriracha. I love crunchy slaws. So what did I do? I threw them all together in a tortilla. It's delicious.


Okay. Now let's discuss some fun stuff. I made these at my friend Kaylyn's because the dorm in which I am an RA for the summer doesn't have real kitchens? We survive with hot plates and mini ovens, but blog stuff is usually not really practical with such a setup. So the motto for the summer is "need kitchen, will travel". Being my friend this summer is going to be very fun.

So anyway. Cooking in others' kitchens has some funky side effects that you might not consider. Other people don't have the same cooking stuff that you do, and, as I learned when cooking at Kaylyn's, you can't just assume everyone will have a sharp knife and a can opener.

That's right. Everything in this recipe was cut with a little butter knife. The good news for you? There's no excuse not to make this. I did it with only a butter knife. You can handle it.


Despite the, um, challenges, these turned out delightfully. We ate them and watched the live-action version of Cinderella, which I highly recommend (yes, I am behind the times). It's such a sweet, aesthetically pleasing movie, that it might have even made the tacos better. I'm not sure, but it's possible. Either way, it was a nice break from the serial killer documentaries I've been binging lately....please tell me I'm not the only one with a weird fascination with those. 

Bottom line: these tacos are what your Wednesday night needs.

Salmon Tacos with Sweet and Spicy Sauce
Ingredients
salmon
1 lb salmon filet
1/3 cup sweet Thai chili sauce
salt and pepper
sesame oil

slaw
2 cups napa cabbage, shredded
1/3 cup mayonnaise
3 green onions, sliced
2 garlic cloves, minced
2 tbsp apple cider vinegar
2 tsp honey
1/4 cup fresh cilantro, minced
salt and pepper

sweet sriracha sauce
1/4 cup mayonnaise
2 tbsp sriracha (less if you aren't a spicy fan)
2 tsp sweet Thai chili sauce

tortillas

  1. Salt and pepper the salmon filet, then place in a bowl and cover with the Thai chili sauce, turning a couple times to coat on all sides. Allow to sit for at least 30 minutes.
  2. Meanwhile, make the slaw. Combine all ingredients in a bowl and mix gently with a fork. 
  3. To make the sauce, stir ingredients together in a bowl.
  4. After the salmon is done soaking, cook it in a pan over medium heat in the sesame oil, flipping after 6 minutes on the first side, and cooking 4 minutes more on the second side.
  5. Gently cut the salmon into strips, then assemble the tacos by adding a piece of salmon, some slaw, and sauce to each tortilla. Enjoy!